All the fun of falsies without the stress of applying! 3D Fiber Lash Mascara Review

If you are anything like me, you don’t buy anything without doing a little research or asking around to make sure you aren’t wasting your money! I spent A LOT of time researching others reviews of the products and the company before I decided to sell Younique and I want to pass on what I have learned. So I to want to introduce you to some of the products I sell through Younique by doing makeup reviews. Remember that you are always welcome to ask me any questions and we can get a virtual party started for you at any time if you want to reap the hostess benefits!! (3D lashes for FREE in September!! Score!)

Of course I had to start with the best selling Younique product!

Younique’s 3D Fiber Lash Mascara:


I already mentioned the how and why of my decision to purchase and sell the product in my Younique business launch. So now let’s actually talk about what I think about these little beauties!

First Impression: Nice case, pretty packaging. Then I opened up the two tubes . “What the heck are these little hairy things?!” was my first thought!

I had read the tutorials and watched some how-to videos but I didn’t really pay attention to the texture of the actual product. These hairy things were in fact the fibers! Go ahead say it, Duh Andrea! So after I recovered from my shock and awe moment I took to applying the mascara. The application is a 3 step process.

Application: So you have your two tubes- The transplanting gel, and the green tea fibers.

10274162_10202288188302185_6471452715404601332_n

The transplanting gel is like a basic thick black mascara. It is used as a base for the fibers to attach to your own eye lashes. I applied a nice thick coat to one eye making sure my lashes weren’t stuck together in any place. Immediately after I then applied a LIGHT coat of the fibers. I cannot stress this enough, a very light coat! About one and a half swoops of the fibers onto your lashes. Anything more will end up making them look clumpy, spidery, and messy. You will have the option to layer for a more dramatic affect later but you want to do this in light coats. The first day I tried the lashes out I only put them on one eye so I could do a comparison between the 3D lashes and my regular mascara. So while I let the 3D dry I applied my regular mascara to the other eye.  After the fibers set I used the transplanting gel again as a way to lock in and clean up the fibers. This is really what makes your look! This will also ensure that the fibers don’t fall onto your cheek during the day (I haven’t had any problem with smudging or flaking of my lashes!).  And Wa-la! Your done! Now this is where I stopped but if you are going for a more dramatic longer looking lash this is where you would repeat the steps!

Review:

  • Step 1: Apply the transplanting gel. Make sure you have a good coat. Make sure your lashes aren’t stuck together
  • Step 2: Apply a light coat of the fibers. Start at the base and swoop to the tips. You can do this one more time if you wish. But lightly, please!!
  • Step 3: Re-apply the transplanting gel to lock in the fibers!

A Sidenote:

Younique actually recommends in their directions that you apply a base coat of mascara to your lashes. I am not sure why they recommend this but I don’t agree with this. I didn’t think I should have to apply a different mascara underneath their product so I tested it out without a base coat of mascara. I don’t see the need for the base coat nor will I ever be putting a base coat on my eyes!

So, it was easy enough. It took me a few applications to get the amount of fibers right. I learned quickly less is more. I like my lashes to look neat and clean and they start to look a little hairy if you apply them thick all at once!

My final opinion: I love them! (as much as one can love in inanimate object!) In comparison it knocks the socks off my old boring drugstore mascara. I once spent over $25 dollars at Ulta for Benefit’s “They’re real” mascara and that didn’t even come close to looking as good as the 3D lashes do! So in my book they are totally worth the money!

“Alright I’m interested, what now?!” Wonderful! You have a few options:

  • Head over to my website and purchase your own set! (And let me know what you think!)
  • Host your own “Virtual party”- what is that? An open event party to all your friends on Facebook! Invite them and they will come! (I feel like that’s a saying or quote someone famous once said!) You Do the inviting, I’ll answer all the questions! And you get all the hostess benefits! (Remember I said free lashes in September!)
  • Become a presenter: The presenters package comes with 1 set of 3D lashes. So if your interested in selling and want to be really adventurous go ahead and by the presenters package (It’s $99 and comes with over $400 dollars worth of makeup for YOU!)

So if your sold! Yayyy! Enjoy your new product! If not, thanks for allowing me to share my new business venture with you and come back for the real fun stuff (Details on our travel adventures!!)


IMG_0879 photo(7)photo 1(3) photo 2(5) 10151356_10201633571312023_8264588315755962758_n 10171244_10152445467744621_5216157741341553605_n


California, Here we Come!

News Alert! News Alert! I have the information you have ALL been waiting for! Where are we headed next?

California! Martinez, California to be exact!

I am excited, and very nervous all at the same time! I have contracted with a new company (no problems with the last company they just didn’t really have anything available in my specialty and area we wanted to be. I’ll miss my really wonderful and friendly recruiter though!). So, we are headed to Martinez, which if you are unfamiliar with the area is about an hour Northeast of San Fransisco! We will be staying in a town a little north of Martinez called Vallejo since it was the closest RV park we could find, about 20 minutes from the hospital.

The position was listed online as a Mother/Baby but when I did the phone interview they were looking for level II nursery. We talked about my experience, specialty and comfort level along with the patients they normal see and decided I would still be a good fit, even though I have never officially worked in a level II nursery. (LV you prepared me well!)

I mentioned that I am excited and nervous and that’s mainly because of the hours not the starting over part (that comes with the travel nursing territory). The position was listed as 3 12 hour shifts but their need must be greater than that because in the interview the manager said she was looking for someone to work 5 8 hour shifts (This isn’t uncommon in California because of their nursing laws most full-time employee’s work 5 8’s since anything over 8 is considered overtime in a day) BUT, since I will be working nights I really didn’t want to work 5 shifts a week because I know I won’t wake up early to have time to do anything in a given day as I would if I worked days. (I think 5 8’s is a day shift’s dream, 7-3 I’d take it in a heartbeat! I think) So I told the manager I didn’t want to work that and she offered me 4 12 hour shifts, 48 hours a week. So THAT’S why I’m scared! That’s a lot of hours in a work week! I’ve done it before, without dying(ha!) once when LV was short-staffed for a couple of weeks so I know it can be done, it’s just really taxing and cuts down on your time off.

These last few weeks of trying to find an assignment have almost made me rethink this whole travel nursing gig. (I know, I hear you all saying “yay, come back home!” from my Louisiana friends!) I was truly spoiled with the ease of finding this first position in Helena. The job popped up, I applied, interview the next day, accepted the job in the interview and signed the contract the day after. Wam-bam and done! It couldn’t have been more textbook perfect. This next assignment was work though! I have spent the last few weeks researching location, pay, talking to new recruiters, filling out new applications, offering references (sorry for the million calls but thanks for the good reviews!) I was blown away by the differences in pay hospitals in the same area can have(a whole other story for another blog one day!)

That being said, I couldn’t be happier with the area we are headed to and the timing of this assignment. We are going to be an hour (give or take a few minutes depending on traffic) from San Fransisco and the Bay area. I have a cousin who lives in San Fransisco right now and I’m super happy to get to see her!

So what does this mean for the next few months?! We get to plan our trip home!!!! Yayyy!!! Like I mentioned, I have been real homesick lately (just missing friends, family and familiarity), coupled with the stress of the unknown. It’s all just made me want to go home! But alas, were back on track and have plans for our La visit in December! Unfortunately this assignment doesn’t end until December 27 (really the 28th since working night shift I wont get off until the next morning) So most likely we will book a plane to fly home that day or the day after! I think we are going to try to stay for 2 weeks at least so everyone clear your schedules so you can have quality Andrea and Jon time!! Yayy, the Nomads are headed h0me!

I think that about sums it up. I do want to say a special thank you to a few friends who helped me out when I was needing some local advice on areas to live! It’s hard to go into an area to live by just blindly picking so the advice I got was well appreciated and helpful! I still want to write more about my trouble’s getting a California license and finding a job in CA, but this is getting too long so I’ll save that for another day!

See you soon Cali!

All our love,

The Nomads


My Younique Business Launch!

So in my quest to be adventurous I have decided to try out a new business venture! Direct sale products have always intrigued me but I have never found anything I’ve liked enough to actually see myself selling to friends and family. How could I recommend a product to someone if I wasn’t totally in love with and exclusively using the product myself?!
Then I came upon Younique. I’m sure you have all heard of the 3D fiber lash mascara hype. I saw the pictures and testimonies all over my Facebook newsfeed. Being someone who LOVES makeup and is always looking to try something new and fun this product really interested me. But I didn’t buy it right away, I watched as a friend of mine posted picture after picture of her gorgeous lashes, then lip gloss, and foundation. All in all she just looked pretty. And I knew she was using the products she was selling exclusively and I knew I wanted to try them.
I reached out to my friend who was selling the product for her input on the company and her opinion on the product. Of course she loved it and had rave reviews of the company! But in true me fashion, I needed to find out for myself. So I discussed this new business idea with Jon, did my typical internet research and product review search and purchased my own set of 3D lashes to try out! They came in the mail along with a couple of samples my friend sent me to try.
I tried them out the next morning while applying my makeup. I was truly skeptical because I was going to have to LOVE them if I was going to sell them. That first morning I only applied the 3D lash to one eye, and I used my regular mascara for the other eye. Wow! What a difference I saw. I ran some errands that day and kept looking in the mirror thinking how silly my lopsided eye’s looked! I spent a few days mulling over this new business venture and mainly trying to convince myself that people wouldn’t think this was just another selling scheme.
How I made the decision:
I’d been using the mascara for about a week. I liked it, I felt pretty, but I wasn’t sold yet. Then one day in a rush to get ready for work I skipped the 3D lashes and applied my regular drugstore mascara. I got to work, looked in the mirror and gasped! Man, I looked bad! Not terrible, but my pretty awake eyes I had become accustomed to with my new lengthy 3D lashes were not there! It was then that I truly realized the difference and the value these two little black tubes of magic had given me! I signed up that night to sell the product.
I don’t want to talk you into something you that will waste your money, you will regret buying, or you will never use. And fortunately with Younique I won’t have to!
What is it?
Younique is an all natural make-up and skin care line. They sell makeup and skin care products at prices similar to MAC, Ulta, Clinique and Mary Kay. I have personally tried all these brands and am comfortable paying the comparable cost Younique has for their products. I love that their products are all natural and safe for sensitive skin.
What do I love about Younique?
  • Their honesty: If you go to Younique’s product website they (as most companies do) have the ingredients for each product listed on the site. But Younique takes it a step further, they give a simple descriptive definition of each ingredient in the product (because who really has the time to look up what all those foreign terms mean?!


  • No Autoship: One of the most annoying features of many direct sale companies is the Autoship feature. If I want to buy something, I want to buy it when I want it not because they want to make sure they are going to make another sale off of me. Younique has no Autoship requirement. So you want to try the lashes? Great, But if you don’t need to buy again for 2 months, no problem. Come on back when you run out and we will hook you up! And in the meantime, don’t worry about your credit card being charged or some unnecessary product showing up on your doorstep to frustrate you!
  • It’s a useful product: I don’t know about you but I wear make-up everyday. I don’t leave the house without at least a little bit of foundation, some powder, a line of eye liner and a wisp of mascara. So to buy a product that I actually can say I will use is really appealing to me.
Have you heard of Younique before? Are you interested yet? Do you want to try the 3D lashes for yourself? If you answered yes to any of these questions then stop into my online store or contact me to host your own party and get all of your own host benefits!
I plan to review each product Younique offers so check back frequently to see my honest opinions and thoughts of the Younique product line!
My super creepy eyes attempting to show off the day I wore both mascaras!!
photo(7)
All my love!!
-The Nomadic Nurse

The Pro’s and Con’s of RV living

We have officially been living in our RV for about three months and while that doesn’t make us experts in any form, we have learned a thing or two along the way. We knew when we bought our RV that life was going to be a little different {space issues, anyone?} than living in a regular apartment or house. Most issues we planned for, some took us by surprise! So here is my Pro/Con RV living list, 3 month edition!

DSCN0896

Pro:

  • Your house can move!: This has been great for weekend trips and the travel lifestyle in general. Notice I said your house can move. That’s the nice thing about an RV, it is totally yours and you can decorate and customize everything to your liking {more on this concept later}. Speaking specifically to moving though, it is so nice not to have to worry about packing {forgetting things} when we are going on a short trip. We have taken the RV on two trips with us while we have been in Montana and both times we left right after I got off working a 12 hour night shift. As you can imagine, the last thing I would ever want to do is come home and pack a bag for a trip. With our RV we are able to put everything in its place, check off our mental RV closing checklist, hitch up the truck and hit the road. Now don’t get me wrong, it takes a little time to get your house road ready, but in my mind its way easier and less stressful than packing bags for a trip AND I have EVERYTHING I own with me {how convenient}! Sidenote: there is a certain guilt factor associated with eating out on a trip when you have your whole kitchen with you 😦
  • Your house is yours: In the travel nursing world, your are most likely moving every 13 weeks. It is rare to find and assignment shorter than 13 weeks so packing up and moving just comes with the territory. If we didn’t live in an RV we would literally be packing our entire lives in boxes and bags and hauling our junk to our next place of residence every 13 weeks. Besides the fact that this would just suck, we would never be able to make a temporary living space “our own”. In our RV we we able to decorate {see: Our RV remodel} everything to make our home cozy and comfortable. We completely customized our RV and there is not a day that goes by that I regret all the hard work we put into making our RV into the home we wanted.
  • You don’t have room for a ton of junk!: I’ll admit, I love to shop. Before we lived in the RV I probably frequented Tjmax and Home Goods on a weekly basis and while this was great for my home decorating look, it wasn’t so great on my piggy bank! Now that we live in the RV I truly have to work to justify all my purchases {yes, I can fit that cute skirt into my already overflowing closet!}. So, I’ve taken to just staying out of my favorite shopping venues and subsequently saved my piggy bank a ton of stress!
  • You get to live REAL close to your housemate/loved ones: I know, I know, this one could have gone both ways for most couples. But Jon and I have been lucky and our close living quarters haven’t been any real source of conflict between us. Now this could also be that my job provides us with ample alone time for both of us since I spend a good 72 hours a week working/sleeping. But truly, we have enjoyed having our own tiny space of the world just for us!
  • Everything has to have a place: When we were deciding what could/should go in our RV we had to make sure we had a place for the said item. We couldn’t take it if we couldn’t ensure it had a designated travel approved spot. This makes cleaning up and putting away our junk a breeze.

Cons:

  • The black tank: Go big or go home right? So I’ll just start with the major whammy, our beloved {yeah right we hate that thing} black tank. The black tank has been a constant source of frustration in our humble abode. A fun “where’s that smell coming from” guessing game. Hint: 90% of the time the black tank wins! We also lucked out and found out that our black tank sensor does not work, so yes, we don’t ever know if “the s**t is starting to hit the fan” literally.  This has lead us to purchases such as the black tank cleaning wand and the see-through poop tube to ensure our tank gets nice and clean with every dump {no pun intended} day.
  • There is no dishwasher: I think if we could hire someone just to do our dishes we would {anyone in the job market for a traveling dishwasher position?} We both hate washing dishes and washing by hand really takes the cake. Not only is it no fun, but you have to work extra hard to make sure you’ve cleaned your dishes well because they aren’t going to run through the dishwasher after you’ve gotten all the food gunk off of them. And, since our hot water heater is only 6 gallons we run out of hot water REAL fast. So yes, I let Jon talk me into buying paper plates, and he could probably talk me into disposable cups and silverware if it wouldn’t break the bank!
  • The teeny-tiny refrigerator: As with every aspect of the RV, space is a major issue, and that is not spared with the fridge. From the outside it doesn’t look too bad, bigger than dorm sized, a little smaller than apartment sized, but man, try to squeeze a weeks worth of food into that thing is a loosing Tetris battle! There have been many grocery shopping occasions where we’ve looked into our basket and said “uh, I don’t think we have enough freezer space for all of this!” which only ends up leading to a frozen chicken vs. ice cream battle, and we all know who is going to win that one! So, I’ve learned am still learning to plan meals., it’s a work in progress.

So, all in all, it’s not that bad, we actually love it! There’s something to be said about having your own place, even if it is on two wheels and has an adjustable square footage!


Thanks for stopping by! All our love!

-The Nomads

Continue reading

Banff’s beautiful Lake Louise, Lake Agnes and Lake Moraine!

Ever since I saw a picture on Pinterest I was baffled by the beauty the small area of Canada called Banff held. I knew while planning our Banff trip that we would have to take a trip to Lake Louise. Even the boarder patrol agent at the U.S./Canada border told us Lake Louise was a must see!
So on day 2 we loaded up our backpacks with snacks and water and headed to Lake Louise to see the lake and hike the Lake Agnes Teahouse Hike! It was super crowded when we got there around 12 and it took us about 15 minutes of circling the parking lot to finally score a spot (we have found this to be the case at many major national park attractions).
  Optimized-DSCN2030

The picture above is from my first sight of Lake Louise. The lake was a milky teal color that just beautifully complemented the snow capped mountains that stood behind. I snapped as many pictures as my impatient fiance’ would allow before he hurried me along to “get into nature and away from all these crowds!”, as he put it.

Banff Collage2 Optimized-DSCN2214

The Lake Agnes Teahouse hike was pretty steep and we found ourselves huffing and puffing for the first mile or so until we adjusted to the change in elevation. For the first mile the trail followed the Lake which provided me with many more perfect photo opportunities.

Optimized-DSCN2199 Optimized-DSCN2209 Optimized-DSCN2194Optimized-DSCN2084

About 3/4 of the way into the hike we came to a lake called Mirror lake which was a crystal clear green colored small lake. It was absolutely gorgeous, surrounded by trees and fresh air! We could see in the very far distance a small house, which someone pointed out to us as the teahouse.

 ??????????????????????????????? ??????????????????????????????? ???????????????????????????????
So we ventured on to the teahouse. After what seemed like an eternity we reached the stairs to the teahouse and were greeted to the most picturesque little lake and small cottage turned into a restaurant. We grabbed a table and started to scan the menu. That was when we found out that the teahouse has NO electricity and is only accessible by foot! So what does that mean? Cash only, no ice(we kept hearing guests ask for ice water and ice in their drinks), and a very limited menu. We ordered tea, lemonade, tea biscuits with homemade jam and an apple crisp. All were absolutely delicious and even more enjoyable when we learned the workers make everything fresh every morning. The workers have summer jobs at the teahouse (since it is only open during the summer) and they live in the attic area above the teahouse for days at a time while they are working. They have no electricity so they are essentially one with nature while they spend their summer working, such a cool way to spend your summer!
A few pictures of the tea house and lake Agnes:
PicMonkey Collage
After tea we headed back down the trail back to Lake Louise. The return trip is always much more enjoyable on trails where you gain a lot of elevation 🙂
Next I wanted to make sure we visited Moraine Lake since it was so close. It was getting late but we were so close I knew we had to make the stop, and we are SO glad we did. The scenery and beauty that Lake Moraine held is indescribable. We enjoyed a zero elevation gain walk around half of the lake while taking loads of pictures!! The trail was pretty deserted so Jon let me take as many pictures as my little heart desired, while he watched out for bears of course! We thought for sure we would spot a bear seeing as we were approaching dusk and it had to be dinner time for them as well, although we didn’t want to be there dinner so we were armed with a plan and our bear spray just in case we had a chance meeting with a big grizzly!
 ?????????????????????????????????????????????????????????????? ??????????????????????????????? ??????????????????????????????? ??????????????????????????????? ??????????????????????????????? ??????????????????????????????? ??????????????????????????????? ??????????????????????????????? ???????????????????????????????
Alas, we made it back to the trail head bear free and headed back for dinner in town. These two hikes were perfect if you only have one day in the Lake Louise area and want to explore a bit!
Thanks for stopping by, stay tuned for the rest of our Banff trip coming soon!
All our love,
The Nomads

Banff Day 1

Canada O Canada!
DSCN2008
A few weeks ago we ventured north to the beautiful town of Banff to explore an area on both of our bucket lists! We made the decision to drive the car and rent a hotel as opposed to hauling the fifth wheel with us. It was difficult to find RV sites and we were unsure of diesel prices in Canada. We found a reasonable hotel in Canmore, a city about 20 minutes away from Banff and stayed at the Ramada Inn in Canmore.
We dropped Cooper of at a local boarding facility in Helena then hit the road for Banff! Banff is about a 7 and a half our drive north of Helena and we made it to Canmore right around dinner time. After we checked in and dropped our bags off we snagged some area brochures and picked a dinner restaurant. Jon decided we should use the picture method to choose a restaurant so after rating the restaurant pictures in the brochure we headed to the restaurant whose picture one for dinner!
We asked to be seated outside on the patio so we could soak in the picturesque view of the surrounding mountains. As we were sitting down we noticed some deer across the street just walking through the town, {so cool!}. I had a yummy salmon and veggie dish and Jon had a white sauced pasta dish.
DSCN1997 DSCN1996 DSCN1995 DSCN1994
After dinner went back to the hotel and changed into our swimsuits. I really wanted to check out on of the local hot springs in Banff. The Banff Upper Hot Springs was the closest to us and only about a 10 minute drive into the mountains outside of the town of Banff. It cost us $7.50 Canadian dollars each to enjoy the springs. We actually were allowed to pay in US dollars but received Canadian change (two loonies and a toonie to be exact, I kid you not, I with I could have taped Jon’s interaction with the lady behind the counter while she explained this to us!)
DSCN2014 DSCN2013 DSCN2015 DSCN2010 DSCN2011 DSCN2012
We spent about an hour enjoying the hot springs and the surrounding scenery.  I was surprised because the water wasn’t as warm as I expected at only 104 degrees it felt lukewarm to me.The Upper Springs is a mineral springs so it did have a slight sulfur smell, but we still managed to enjoy! It was pretty crowded when we went at about 8 in the evening, so it felt kind of weird sitting in a large bathtub with a bunch of strangers. I could only take about an hour in the warm water before I started to feel hot and uncomfortable so I suggested we leave and go get a sweet treat!
We headed back into the town of Banff and headed to Cow’s creamery. After the tormentors decision on a single ice cream flavor, we both ended up with the exact same flavor! Vanilla ice cream with cow (chocolate covered peanut butter) pieces and a caramel ribbon. Delicious! We enjoyed our ice cream while exploring the town of Banff a bit for a nice ending to our first day (or really evening) in Banff!
Stay tuned for Banff day 2- Lake Louise!

The Grand Teton Moose Mission

On day three of our Yellowstone vacation we decided to head down south and see Grand Teton National Park. From West Yellowstone it was about a 2 hour drive down to the entrance of the park. Because of this we decided to take Cooper along with us so he didn’t have to be cooped (pun totally intended!) in his cage. This meant we weren’t going to be able to do any hikes since dogs aren’t allowed on any of the trails. The weather looked like it had the potential for rain so we weren’t too bummed out about the hiking.
DSCN1933
 
The first thing we did when we arrived in the park was stop at the ranger station for a map, and a little advice on wildlife sightings. Jon was lucky enough to see his animal of choice early in the trip, while the animal I wanted to see had still managed to elude us! Jon likes to say I pick the hardest animals to find. I just wanted to see a Moose! So in preparation for the day Jon had researched the best places to find moose. Low and behold, all his research pointed to a place called Moose Junction and more specifically, Moose road. The ranger confirmed his research and told us that Moose Junction is prime moose habitat. So armed with a map and our moose sighting eyes we set out on our mission. A moosey mission as Jon called it, and if you recall from the buffalo sighting, there’s a song for this mission as well but I’ll spare you the boring details! Moose Junction is a straight shot down the park and is the last junction before the end of the park. We found Moose road and drove it back and forth with no wildlife sightings. At one point we got out of the car and picked some sage grass which was growing very plentiful in the area. It smells just like sage and reminded me of relaxing aromatherapy.
DSCN1930 DSCN1909 DSCN1911 DSCN1913 DSCN1918
 
Sage grass:
 
 
DSCN1923 DSCN1924 DSCN1925
 
At the end of the road Jon let me take over the driving and I let him take over the navigating. This was mistake #1! While deciding what we would do next Jon mentioned that there was a road up ahead that would lead to the Snake River. He said, “I think it’s a back road, it may be paved at first and I think we have a really good chance of seeing some moose.” So, I follow my navigators orders and turn onto a non-paved, very bumpy dirt road. It doesn’t take long for me to realize that we are headed into the MIDDLE OF NOWHERE. Up ahead we notice an SUV stopped and the driver appeared to be scouting out the road ahead. He told us it looked steep but leveled out up ahead and we should be fine. So, we of course let him go first. He started to drive away then literately disappeared down the hill, at this point I’m asking Jon if he still thinks this is a good idea and he of course says yes. So we follow the SUV ahead until we get to the river. The SUV stops off at the entrance to an even rockier and dustier road. I’m starting to panic because there’s no way we are going to get back up this steep hill we came down and this road ahead looks uber sketchy. Jon of course is gung-ho for this adventure and as we switched drivers (because I was not going to be responsible for any truck damage we might occur on this treacherous road) he handed me the map. That’s when I notice the road he had led us down. The road is an obvious back road that says “ATV road, 4 wheel drive required”, to which Jon argues, “it says recommended, plus we have four wheels.” 4 wheels, 4-wheel drive…can’t be that big of a difference right?! HAHA
 
So, with no choice but to drive on, we started down the LONG dirt road. We were literately driving within feet of a very steep and high cliff on the banks of the Snake River. (Don’t worry mom, were still alive!) We stopped frequently for wildlife checks, convinced that we would see something with our great view of the woods below. We literately saw NO wildlife along the banks of the river or in the surrounding forest. It was so strange especially since it was such a deserted part of the park. The 12 mile road took us about 2 hours to drive. At the VERY end, I kid you not about 1/2 mile from the main road we came upon a heard of Bull Elk grazing on the surrounding Sage grass. They were beautiful creatures and made the long, bumpy and disappointing drive totally worth our time!
 
DSCN1947 DSCN1946 DSCN1934 DSCN1939 DSCN1940 DSCN1942
DSCN1951 DSCN1954 DSCN1955DSCN1957 DSCN1961 DSCN1966 DSCN1964
Next up was dinner. We went back into Moose Junction (With the hopes of seeing a moose of course) and went to an outdoor chuck-wagon cookout. The food was sub-par but the entertainment was great. They were having a live music session showcasing anyone who felt like stepping up on stage to play.
DSCN1973
The entertainment was awesome but we had a mission to accomplish. We decided to drive Moose road one more time in hopes that the evening would bring about more wandering wildlife. No such luck! We saw a few dear but NO moose, or any other wildlife for that matter (I would have settled for a bear sighting as well!) After finishing our drive along Moose Road we aborted our mission and headed home. Hopefully we may have better luck moose hunting on our next trip in Banff National Park.
 
So, although I didn’t get to see any Moose, we thought The Grand Tetons were beautiful and are even talking about coming back to camp and hike in this area before we leave Montana. Our trip to Yellowstone and The Grand Tetons was short but it was definitely an awesome experience!
 
Thanks for following along! Until next time!
 -The Nomads
 
A few extra pictures from our day:
We stopped for lunch at Leek’s Marina a long Jackson lake and took these pictures!
DSCN1885 DSCN1887 DSCN1888 DSCN1889 DSCN1890 DSCN1891 DSCN1892 DSCN1893

DIY cabinet remodel with Nuvo Paint

The topic of today is do it yourself (DIY) projects. During the whole process of our RV renovation I used other people’s blogs and internet sources for my inspiration and project research. I research the heck out of all my projects before I start most of the time, to avoid frustrating mistakes someone else has probably already learned from! So I was super excited to write my own DIY how-to’s and product reviews (I was in no way endorsed or compensated for my time or supplies and all opinions are my own)! For my first review I want to show everyone how we accomplished our biggest RV makeover, the cabinets.
For this projects I took to the internet to research cabinet painting. I came across many blogs and DIY projects of people who had already completed this monumental task. The pictures always looked amazing, and I was super excited to transform our RV! We choose white (coconut espresso to be exact) in an effort to open up the look of our small space.
After reading everything I could find on the internet I settled on a product called “Nuvo Cabinet Paint”. It promised to be an all-in-one kit that took most people 8 hours to finish, in fact they promise you can put your kitchen back together within 4 hours of painting. Well, either we have triple the amount of cabinets or we aren’t most people. This project took us almost 3 weeks!
The first thing I had to do was sand the cabinets. The kit provides you with a small piece of foam sandpaper. I used that (and about the rest of the sandpaper inventory stock at Lowe’s and Home depot!) The directions said to lightly sand, but I just had a feeling that the paint would not stick if I didn’t do my best to remove the clear varnish that was covering the cabinets. This obviously called for much more extensive sanding than the “lightly” recommendation. I was also facing the challenge of faux wood. Everything except for the actual drawers and cabinet doors had what appeared to be a faux laminate covering that I was going to need to paint. I ended up needing to rough up every surface I planned on painting. This took me about 3 days before I was ready to paint.
I choose the Nuvo brand based on reviews that said you didn’t need a paint primer, you only needed to “lightly sand” and the promises that the paint would wear well. I have to say, while my cabinets look great, the paint fell short on all my initial hopes.
If I had to do this project again I would without a doubt use a base of primer, for a couple of reasons:
                          1. As a first coat of paint – Since I was going from light wood to white I was essentially going from a dark color to a light color.
                          This took 3 coats of paint to cover completely. A primer would have prevented unnecessary coats of my pricey liquid gold
                          cabinet paint!
                          2. To reduce the amount of sanding- As I mentioned earlier, all of my cabinets are a faux laminate or had some type of glaze over
                          them.  I knew if I didn’t get it all off the paint would not stick to the cabinet. After learning the value of primer I believe that the
                          primer would have stuck to the cabinets and then the NUVO paint would have just adhered to the primer. I also think this
                          would have better protected my cabinets in the long run as some of them are starting to chip already from furniture
                          rubbing against them!
Ok, off my primer soap box for now! The next step was to clean the cabinets. I had to vacuum the dust and then wipe the cabinets that were full of leftover sanding particles. Then came the fun, the paint! I laid all the cabinets out on plastic in the garage before I started. This was mistake #2! After I painted the first couple doors I realized they were going to stick to the plastic when dried. So we put up some tables in the garage and placed the cabinets on wood chips that elevated them about an inch off the table so they wouldn’t stick. The tables made the painting 100 times easier!
DSCN0950 As a side note: NUVO recommends you paint while the doors are still attached to the cabinets but I didn’t want to worry about painting around the hardware. We removed the doors so we could make sure everything was painted perfectly!
I found it easiest to paint in the raised part of the doors with the roller first. Then the groves with the paintbrush and then touch up with the brush and roller. Watch for drips because they aren’t noticeable when painting but they are SO noticeable (and not fixable) when dried! I also always went with the direction of the grain of the wood.  Nuvo recommends a 2 hour dry time before applying the second coat. I used my 2 hours to start painting the cabinets in the RV. After I applied the second and {what I thought} was the final coat I needed to wait for them to dry before I flipped them. Since NUVO recommends you keep the doors attached while painting you don’t need to worry about dry time, and looking back, this wouldn’t have been a terrible idea. But because I wanted to be different, I had to wait for my cabinets to dry. Now, I live in Southern Louisiana and it was HOT and muggy. So this really threw a wrench in my plans to dry my cabinets. Luckily I had to work for a few days so the cabinets had some time to dry while I was busy.
Once dry, Jon reinstalled the hardware for me while I painted the outside and inside of the cabinets. I was really concerned about this part because this was the faux wood. And just as I suspected, it wouldn’t completely stick to the surface. Basically any corners or edges that weren’t sanded completely caused the paint to bubble and spread leaving unpainted portions of cabinet. I had to let it dry (or wipe it off) then re-sand and re-paint. As frustrating as it was, the finished product looks great!
So once everything was dry we re-installed the doors. That’s when we decided the cabinets needed another coat of paint. When we compared the cabinets to the doors, the doors looked kinda streaky and you could still see wood underneath. This would have been nice if we were going for a rustic look, but the cabinets themselves were totally white and didn’t match! So the third coat went on, and then the touch-ups went on (I swear I thought I’d never finish with those stinking cabinets!).
Ok, let me also mention that the small can you see in the first picture lasted me all of one coat of my cabinet doors. Granted, I have tons of cabinets in the RV but with NUVO’s prediction I thought I could make it go a little further. So on a frustrated whim I drove to Sherwin Williams and talked to the sales associate. She showed me their brand of cabinet paint and offered to paint match the sample of NUVO I had brought. I didn’t have the patience to wait for another can of NUVO in the mail so I bought a gallon of Sherwin Williams cabinet paint. This finished up the inside and outside of the first coat of the cabinets. So yes, I ended up buying another gallon. In total I used one quart of the NUVO paint provided in the kit and 2 gallons of Sherwin Williams paint (Should this be a review of Sherwin Williams cabinet paint?! whoops!) But let me mention, I also painted the trim in the RV and a door. If you are going to paint a regular kitchen you can probably get away with less paint than I used.
Now, let’s just summarize all this information I just threw at you!
  • Nuvo paint: Good kit, good instructions, but a little pricey ($69.95 for the kit). Overall, not really necessary once I ended up buying the Sherwin Williams paint.
  • Sanding: Sand it all! or use primer!
  • Paint coats: light coats, paint to your design preference. Be prepared to coat 3 times if you want full coverage.
  • Color: I used coconut espresso, which is an off white and looks great on my cabinets! I didn’t want stark white and this really softens the look of my kitchen/living room.

My opinion: This was a must-do project for me to change the look of our new home. So, it can be done, but it’s a TON of work! It doesn’t wear as well as I hoped. Now, you have to keep in mind that when we open and close our slides the furniture is constantly rubbing against each other. That being said, I have A LOT of nicks in my paint that will have to be touched up, eventually. But really, I love how our cabinets look and I would do it again if I had to (just don’t hand me a paintbrush any time soon please!) So, I’ll leave you with some pictures from our remodel!


DSCN0948 DSCN0952
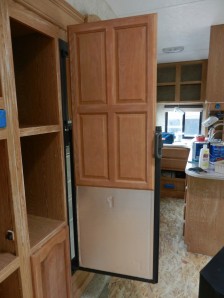
Refrigerator door being removed for painting! DSCN0955 Don’t mind my painting outfit, it was cold that day!

IMG_1349 IMG_1297 IMG_1302 IMG_1305 IMG_1345

IMG_1346 IMG_1347 IMG_1348

Finished Product!

DSCN1461 DSCN1455

DSCN1457

That’s a wrap! Thanks for visiting!

Until next time!

-The Nomad’s!

Yellowstone Day #2

On our quick and jam-packed trip to Yellowstone we decided to spend day #2 touring the Upper loop of Yellowstone.

Yellowstone

I put some chili in the crock-pot for dinner that night, Yummmm. An important point for RV living is that you have to make a point to eat at home otherwise you’ll be spending a fortune eating out. Take advantage of the fact that you have your whole home with you to make cooking easier even if you are on vacation!

We were staying in West Yellowstone which gave us easy access to the Upper loop for our drive. Our first stop was Norris Geyser basin home of the Porcelain Basin and The Back Basin. The Porcelain Basin was a really interesting flat piece of land made up of multiple geyser’s and Hot Springs. We walked the short board walk then went on to the Back Basin. Most of these boardwalk walk’s were short little detours from the main road, but man, the Back Basin threw us for a loop! It was only a 1.5 mile loop trail with very little difference in elevation. But of course we had decided to start this loop in the heat of the day and without our water. BAD IDEA! This basin area was a vast land of non-shaded hot geysers and springs, as you would imagine from its name. Most of the thermals at Yellowstone are very acidic and are made up of Sulfur which, if you remember I mentioned in the last post smells disgusting! So, we ended up with headaches and I got to listen to Jon’s rant about how dangerous this had to be for our bodies (who knew he was so concerned?!)

DSCN1840 I am pretty sure a bear scratched this tree!

DSCN1793 DSCN1795 DSCN1798 DSCN1799 DSCN1800 DSCN1801 DSCN1804 DSCN1805 DSCN1806 DSCN1808 DSCN1813 DSCN1816 DSCN1820 DSCN1823 DSCN1825 DSCN1826 DSCN1827 DSCN1831 DSCN1834 DSCN1835 DSCN1837 DSCN1839

After we got back to the car and loaded up on water and snacks we drove north to Mammoth Hot springs. This area featured a really neat cascading natural limestone display (and a female Elk walking through the flat limestone area!). My pictures are limited from this area because my camera was showing memory card full and I didn’t figure out until we made it back home that I had forgotten to delete the prior day’s pictures when I uploaded them to my computer.

DSCN1870 DSCN1871 DSCN1872 DSCN1873 DSCN1874 DSCN1875 DSCN1876 DSCN1877 DSCN1878 DSCN1880 DSCN1882

We stopped in Mammoth for a snack and headed on to Canyon Village. The Canyon Village area is home to an area that they call “The Grand Canyon” (We can cross Arizona off our bucket list now right?!, Just kidding!) The Yellowstone River flows the Canyon’s length, which is about 20 miles. We stopped near the Upper Falls to get a view of the falls and take some pictures. I had done a good bit of research on the area and really wanted to do a hike near the falls but our time was really limited this day and it was very close to dinnertime. If you are ever in the area please hike the lower falls south rim trail and take pictures so I can live vicariously through you!!

photo 1(1) photo 1(2) photo 2(2) photo 2(4) photo 3(1) photo 3 photo 4(1) photo 4(3)

Once we arrived home we were greeted with the delicious smell of my homemade chili! It is always a gamble leaving food all day in Jon’s crock-pot, it’s a very temperamental appliance. Jon mentioned something about user error but we all know that’s a joke! The chili turned out delicious this time. Dinner was great and we were exhausted so it was time for light’s out and sweet dreams for our upcoming day in the Grand Tetons!


Stay tuned for our Grand Teton adventure! (and since we always air on the side of adventure, I’ll just preface it and mention that it was indeed a grand adventure!)

Until Next Time!


-The Nomads

Where the buffalo roam! Yellowstone Day #1


We recently had a 5 day stretch off from my work schedule and decided to pack the RV up and head to Yellowstone National Park (YNP). We stayed in West Yellowstone which is only a 2 and ½ hour drive away from Helena. The town of West Yellowstone is set up nicely for tourists with many restaurant choices and souvenir shops! (and of course our personal favorite, ice cream!)

photo 1 photo 2(1)

We ended up staying in a very small RV park called the Pony Express RV park. Since we booked this trip about 2 weeks in advance our options were limited. The RV park had everything we needed amenity-wise; sewer, 50 amp electric, water hook ups and was less than 5 minutes from the West entrance of Yellowstone. This was definitely a no frills RV park. The spaces were small with just enough room for our slides to extend and the back of our RV bordered a main road. We couldn’t complain though because it had everything we needed for a reasonable nightly rate.

Since we only had 4 days we had our itinerary packed so we could see YNP and the Grand Teatons all in one trip. On day one we drove the “lower loop” of YNP which most known for showcasing Old Faithful. Our first stop was Firehole Canyon Drive where we stopped for a photo op of the falls. This is a 2 mile one way road that starts from the loop and merges back at the loop when it is finished. It is also home to the Firehole Falls swimming hole which is supposed to be a warm water flowing river perfect for a summer swim! We didn’t stop but were hoping to come back one day during the trip.

DSCN1615 DSCN1616 DSCN1619

Next stop was the Lower Geyser Basin also known as Fountain Paint Pot. This is home to many of YNP’s if best and most diverse geyser’s. It is an easy 0.5 mile boardwalk hike (if you can call it a hike, it’s has no elevation gain and is a level surface, but they call it a hike.) This was a really cool showcase of all four of YNP’s hydrothermal features; mudpots, geysers, hot springs, and fumaroles. And of course the pleasant sulfur smell that can only be best described as being similar to boiled eggs.

DSCN1650 DSCN1622 DSCN1623 DSCN1624 DSCN1625 DSCN1628 DSCN1633 DSCN1634 DSCN1637 DSCN1638 DSCN1639 DSCN1640 DSCN1641 DSCN1643 DSCN1647 DSCN1648

After the basin we headed to Midway Geyser Basin home of the Grand Prismatic Spring. I was super excited to see this because the pictures of this spring are absolutely amazing! It was really cool but I was definitely unimpressed after seeing pictures online. The viewing boardwalk for the spring should have been built on a platform to allow for a better sight. Since you are on the same level as the ground below and the spring is about 100 feet in front of you, you cant really get a good view of the whole spring. There appeared to be a trail on a nearby hill you could climb for better views but we weren’t sure where it started and didn’t have a whole lot of time to spare for a hike. I’d recommend finding the hike though if this spring is of any interest to you in your visit to YNP for a much better view. (Totally cool side note: If you read CNN or follow the news you may have heard about the “Drone” that sunk in the Grand Prismatic Springs recently. Well, Jon and I just so happened to be at the springs that the exact moment the drone drowned. It was buzzing over head while we were viewing the other springs and as we walked up to the Grand Prismatic Springs we noticed it seemed to be bobbing up and down in the air as if it was running out of battery or loosing a signal. Then all of the sudden it just fell right into the Spring! Everyone around was sort of awestruck as we were all thinking, “Did that really just happen?” Someone clapped and then we all went back to sightseeing! I totally wish I would have gotten a picture/video at the time but I didn’t. So, no pictures, but we have a really cool story to retell! http://www.cnn.com/2014/08/07/us/drones-yellowstone/ )

DSCN1685 DSCN1652 DSCN1653 DSCN1654 DSCN1657 DSCN1658 DSCN1659 DSCN1662 DSCN1669 DSCN1671 DSCN1672 DSCN1676 DSCN1677 DSCN1679 DSCN1680 DSCN1681 DSCN1684

Next it was time to see the big kahuna, or better known as Old Faithful. This was a serious tourist attraction. There was hundreds of people milling around the lodge and land near the geyser waiting for the next eruption. The geyser erupts every 90 minutes and we arrived about 15 minutes after the last eruption. So we walked along the boardwalk checking out the other geothermal wonders. These thermals were so intriguing to me because you truly can’t see them anywhere else in the States. It is definitely a vacation worth taking just to see these natural wonders. We then found a spot to wait for Old Faithfuls eruption. It lived up to its name and erupted right on schedule for about 2 minutes. We definitely enjoyed checking that off our bucket list!

DSCN1744 DSCN1745 DSCN1692 DSCN1694 DSCN1696 DSCN1697 DSCN1702 DSCN1703 DSCN1704 DSCN1705 DSCN1706 DSCN1707 DSCN1708 DSCN1713 DSCN1714 DSCN1715 DSCN1717 DSCN1723 DSCN1732 DSCN1734 DSCN1737 DSCN1739 DSCN1740 DSCN1741 DSCN1742 DSCN1743

After snack time and a little souvenir shopping at the lodge it was back to the truck to finish out the loop. We had more than half the loop left and took us about 2 hours to drive, even with our surprise delay. Jon mentioned numerous times throughout the day that he, “just wanted to see a buffalo”. Despite seeing buffalo’s on our trip through Custer State Park he really wanted to see a free roaming heard of buffalo. Well his wishes were granted and then some! We drove into a traffic jam that delayed us about 30 minutes. While we waited we debated on which animal was causing the hold-up. My hope and guess was a moose, Jon stuck to his buffalo. Sure enough when traffic started moving we were greeted with a small heard of buffalo and some forest rangers directing traffic. They rushed us along with the rest of the traffic and we were pretty disappointed to not even have enough time for a decent picture. But just up the road Jon’s wishes were granted as there were hundreds of buffalo roaming the land. We got awesome shot’s of these buffalo right alongside of the car. It was really neat and Jon was so excited! (Ask him to sing his now infamous buffalo song!)

DSCN1754 DSCN1763 DSCN1764 DSCN1769 DSCN1773 DSCN1774 DSCN1778 DSCN1781 DSCN1782 DSCN1783 DSCN1784 DSCN1787 DSCN1788 DSCN1790 DSCN1791

So all in all, awesome day 1 in YNP. This was an easy itinerary for the Old Faithful route and I am fairly confident that we hit all the important sights along the way.


All our love!

-The Nomads